
How to Add Products to thesheet
Add products to your projects in thesheet
You can add products to your project in thesheet in three ways:
Using the Product Clipper
The Product Clipper can be downloaded from the Chrome Web Store and it is the easiest way to add products directly to your project or for growing your Product Library. This Chrome extension with AI lets you clip products with images and full details within seconds, not minutes from any supplier websites.
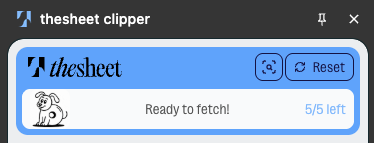
Just click on Donut's "Ready to fetch!" button and our AI helper fetches everything.
For a full guide on using the Product Clipper, click below:
From your Product Library
The Product Library allows you to manage all saved products in one place. While it takes time to build, it's a valuable resource for future projects. Learn how to build your Product Library
Note: Products must first be added to your library from active projects or via the Product Clipper.
Option 1: from your Product Library.
- Go to your Product Library within thesheet
- Use the search bar to find the product or material you need (e.g., "chair").
- Click the Add to Project button on the desired product.
- A sidebar will appear; select the project from your list of active projects.
- Select the space to which you want to add the product.
The product will now be added to your selected project.
Option 2: from your Project
- In the Sheet view of your project, click the blue + icon at the bottom right of your screen.
- Select Search Library from the three main features.
- Use the search bar to find the product or material you need (e.g., "chair").
- Click the + icon next to the product you would like to add
- A sidebar will appear; select the space to which you want to add the product.
The product will now be added to your project.
Manually adding a product to your project
- In the Sheet view of your project, click the blue + icon at the bottom right of your screen.
- Select Add Product from the three main features.
- The Product Details page will open, where you can manually enter product details.
- Add high-resolution images; the first image will be set as the primary image.
- Select the Space allocation from the dropdown; if no Spaces are created, it will default to the main project.
- Choose the correct product category from the dropdown. Full list of product categories
- Continue adding relevant product information like Name, Price, Dimensions, etc.
For a full list of product fields, click here.
- Close the Product Details page to view your product in the Sheet view.
Note: This method is more time-consuming. For faster results, use the Product Clipper or Product Library.